Easy Crochet Beanie Pattern: Simple 30-Minute Project
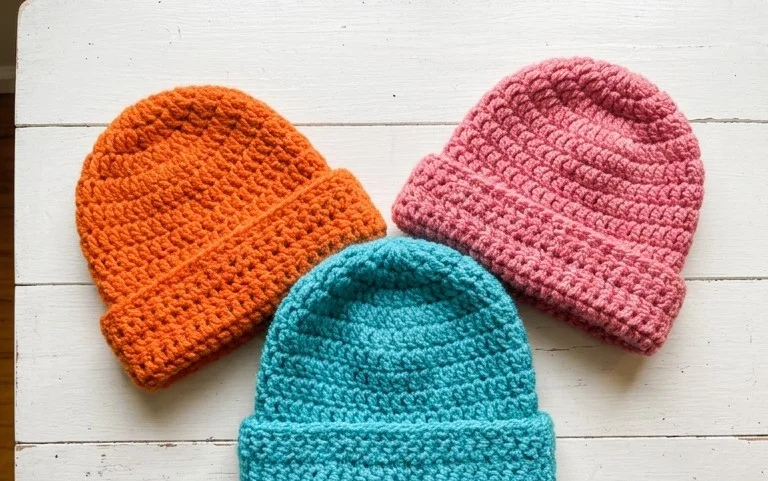
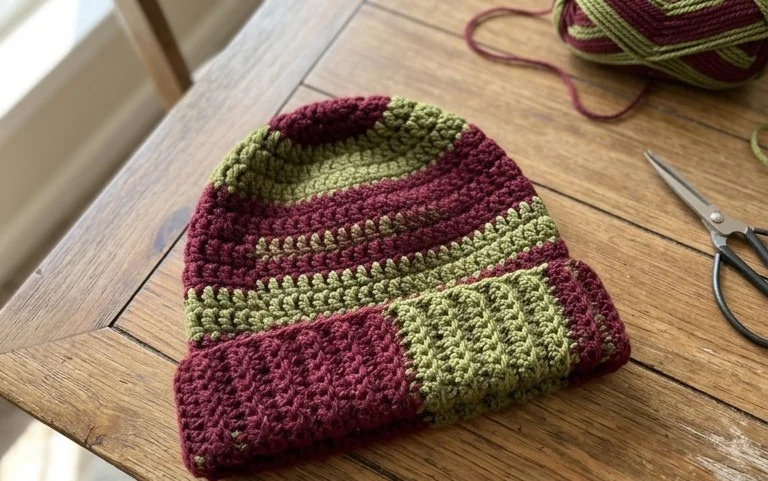
This simple wool beanie has a snug, double-thick brim that keeps your ears warm during early morning frost. It is a reliable project for anyone new to crochet because you only need to know how to work basic stitches into the back loops to create that stretchy, ribbed fabric. The design grows quickly under your hook, turning a standard skein of yarn into a finished accessory in less than an hour. You will learn how to seam your flat rectangle into a cozy tube and gather the top perfectly, creating a professional-looking cap that fits almost any adult comfortably.
Why You’ll Love This Pattern
This classic crochet beanie provides a snug, warm fit perfect for chilly autumn mornings and deep winter walks. The design uses a simple textured ribbing that stretches comfortably to accommodate different head sizes while maintaining its shape through repeated wear. You will find this project incredibly fast to work up, as the primary stitch pattern is repetitive and meditative, making it an ideal choice for crocheting while listening to a podcast or watching television. Because it works well with a single skein of standard weight yarn, it serves as a practical, low-cost gift that appears far more complex than the stitches actually require.
I finished this hat in just two evenings. The texture is beautiful and the sizing instructions are spot on for a standard adult fit.
— Sarah, hobbyist crocheter
Pattern Overview & Skill Level
- Skill Level: Beginner
- Approximate Time: 3 to 4 hours
- Construction: Worked as a flat rectangle in rows, then seamed at the side and gathered at the crown to form a classic beanie shape.
- Finished Dimensions: 9 inches tall by 18 inches circumference (unstretched).
Materials & Supplies Needed
- Yarn: Worsted weight (#4), wool or acrylic blend, approximately 200 yards.
- Hook Size: 5.0 mm (H-8).
- Notions: Tapestry needle for seaming and weaving ends, a stitch marker, and scissors.
- Yarn Substitutions: Cotton yarn will result in a heavier, less stretchy hat. If using a lighter DK weight yarn, increase your starting chain length by 10% to achieve the same finished size.
Stitch Guide & Abbreviations (US Terms)
- ch = chain
- sc = single crochet
- sl st = slip stitch
- BLO = back loop only (inserting the hook only through the back loop of the stitch from the previous row)
- st/sts = stitch/stitches
Step-by-Step Pattern Instructions
Hat Body
The hat is worked in rows to create a ribbed fabric. When working into the BLO, you create the elastic ridges that give the beanie its professional appearance.
- Row 1: Ch 45. Sc in the second ch from the hook and in every ch across. Ch 1, turn. (44 sts)
- Row 2: Sc in the BLO of each st across. Ch 1, turn. (44 sts)
- Rows 3–60: Repeat Row 2 until the piece measures 18 inches in length when laid flat. Do not fasten off.
Assembly and Finishing
- Seaming: Fold the piece in half, bringing the short ends together. Slip stitch through both thicknesses (the starting chain edge and the current row edge) to join the fabric into a tube. Fasten off, leaving a 12-inch long yarn tail.
- Gathering the Crown: Thread your tapestry needle with the long tail. Weave the needle in and out through the stitches along one open edge of the tube. Pull the yarn tail tight to close the opening completely. Secure the yarn with a knot on the inside of the hat.
- Weaving Ends: Turn the hat inside out to ensure the seam remains on the interior. Weave in all remaining yarn ends securely through the base of the stitches to prevent unraveling.
Care & Washing Instructions
- Hand wash your finished hat in cool water using a mild wool-safe detergent to preserve the elasticity of the fibers.
- Gently squeeze out excess water with a towel, taking care not to wring or twist the fabric, then lay the hat flat on a dry surface to air dry.
- Reshape the hat while damp if the ribbing appears uneven, allowing it to dry naturally away from direct sunlight or high heat sources.
Pro Tips & Common Mistakes to Avoid
Maintain consistent tension throughout the project; if your stitches are too tight, the finished hat will lose its necessary stretch. Always use a stitch marker on the first stitch of every row to ensure you do not inadvertently skip the final stitch, which would cause the edges of your rectangle to taper. When weaving in your ends, anchor them by moving the needle in three different directions through the fabric to guarantee they stay put after multiple washes. If you wish to adjust the size, add or subtract foundation chains in increments of two, keeping in mind that each additional 10 stitches will add roughly 2 inches to the total circumference of the hat.
Frequently Asked Questions
Can I use a different yarn weight for this pattern?
Yes, but you must adjust your starting chain and row count to match your gauge. Thinner yarn requires more stitches to reach the same dimensions.
Is this pattern suitable for someone who has only done one project before?
This is an excellent choice for a second project because it relies on the single crochet stitch and teaches the importance of working in the back loop to create texture.
How do I know if I have enough yarn to finish?
Weigh your skein before you start. If you have less than 150 yards of worsted weight yarn, you may need a second skein to complete the full length.
Can I sell the hats I make from this pattern?
You are welcome to sell finished items made from this design. Please provide credit to the designer in your product listings.
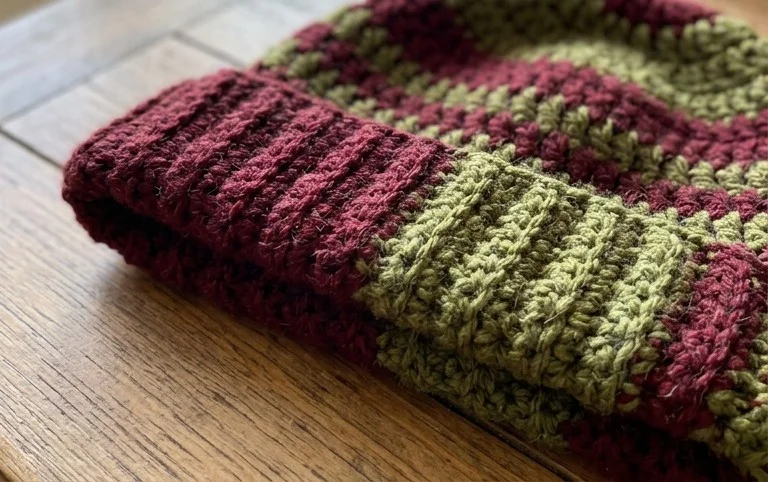
You now have a warm accessory ready for your next cold-weather outing. Try using a variegated yarn for your second hat to give it a completely different look without changing the stitch count. If you enjoy how these simple loops form such a dense and squishy fabric, look through our archive for more winter gear ideas. Please share a photo of your finished work with us online so we can see which color combination you chose for your own version of this classic cap.