Easy Crochet Folded Cuff Beanie: Free Step-by-Step Pattern
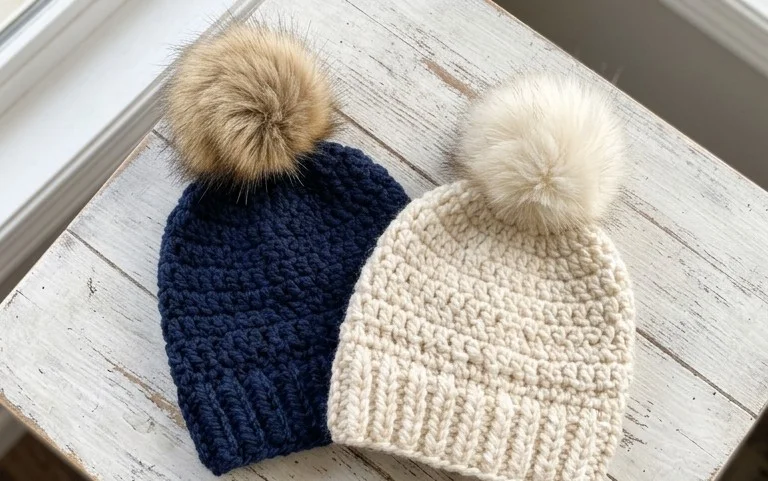
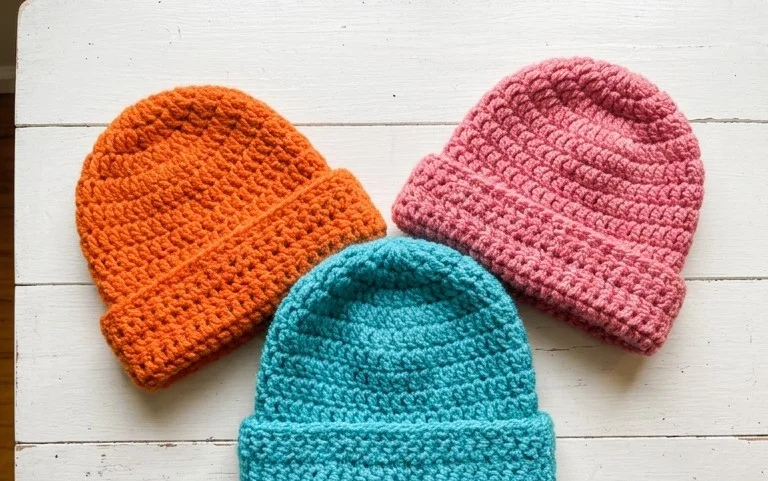
This squishy, warm hat features a deep, double-thick brim that stays snug against your ears throughout the coldest winter mornings. The dense ribbed texture mimics expensive boutique knitwear while remaining simple enough for anyone who has just picked up a hook. You build the shape by working a long, flat rectangle of half double crochets, which removes the need for tricky crown shaping or complicated stitch counts. It is a satisfying weekend project that turns a single skein of yarn into a reliable accessory for friends or family. You will master the back-loop-only technique to create those distinctive, stretchy ridges during this quick assembly process.
Why You’ll Love This Pattern
This crochet ribbed beanie pattern utilizes a simple half double crochet stitch worked in the back loops, creating a classic, professional-looking knit texture that stretches beautifully to fit most head sizes. It works up in a single evening, making it a reliable choice for last-minute gifts or stocking your market inventory. Because it is constructed as a flat rectangle, you avoid the complexity of shaping crowns with decreases, which often intimidates newer crocheters. The vertical ribbing provides excellent elasticity and thermal retention, ensuring the hat stays snug against the forehead during colder months.
I finished this hat in one weekend using a single skein of wool. The instructions were easy to follow and the ribbing looks exactly like store-bought knitwear.
— Sarah, hobbyist crafter
Pattern Overview & Skill Level
- Skill Level: Beginner
- Approximate Time: 3 to 4 hours
- Construction: Worked flat in rows to create a rectangle, then seamed to form a tube and gathered at the crown.
- Finished Dimensions & Sizing: 18 inches circumference (unstretched) by 9 inches height. Fits an average adult head size.
Materials & Supplies Needed
- Yarn: Worsted #4 weight acrylic or wool blend, approximately 200 yards.
- Hook Size: 5.0 mm (US H-8) crochet hook.
- Notions: Large-eye tapestry needle, measuring tape, and a pair of scissors.
- Yarn substitutions: You may use cotton yarn, though note that it lacks the natural stretch of wool or acrylic, which may result in a tighter fit. If using a DK weight yarn, increase your starting chain by 5-8 stitches to maintain the same finished width.
Stitch Guide & Abbreviations (US Terms)
- ch = chain
- hdc = half double crochet
- BLO = back loop only (insert hook under the back loop of the stitch only, rather than both loops)
- sl st = slip stitch
- st/sts = stitch/stitches
- hdc-BLO = half double crochet in the back loop only
Step-by-Step Pattern Instructions
Hat Body
- Row 1: Ch 45. Hdc in the third ch from the hook and each ch across. Ch 2 and turn. (43 sts)
- Row 2: Hdc-BLO in every st across. Ch 2 and turn. (43 sts)
- Rows 3 to 60: Repeat Row 2 until the piece measures 18 inches in length when laid flat.
- Finishing the body: Fasten off, leaving a 12-inch tail of yarn for sewing.
Assembly
- Fold the rectangle in half so the short edges touch, matching the stitches from Row 60 to the foundation chain.
- Using your tapestry needle and the long tail, sl st or whipstitch through the back loops of both the foundation row and Row 60 to join them into a tube.
- Turn the tube inside out so the seam is on the inside.
- Weave the yarn in and out through the stitches along the top edge of the tube. Pull the yarn tail tight to cinch the top of the hat closed. Secure with a knot.
- Weave in all remaining yarn ends securely on the inside of the hat.
Care & Washing Instructions
- Hand wash in cool water using a mild detergent to maintain the fiber integrity.
- Lay the hat flat on a clean towel to air dry; do not hang, as this can cause the hat to lose its shape and stretch out permanently.
- If the ribbing loses definition after washing, lightly steam the fabric with an iron on the lowest setting, ensuring the iron does not touch the yarn directly.
Pro Tips & Common Mistakes to Avoid
- Maintain consistent tension when working your hdc stitches. If your stitches are too tight, the hat will lose its elasticity and be difficult to pull onto your head.
- Place a stitch marker in the first stitch of every row to ensure you are not accidentally skipping the last stitch, which keeps your side edges straight.
- When weaving in ends, use the “duplicate stitch” method by tracing the path of the yarn through existing stitches. This hides the tail invisibly and prevents the seam from unraveling.
- To adjust the size, simply add or subtract rows. Each pair of rows adds approximately 0.5 inches to the total circumference of the hat.
Frequently Asked Questions
Can I use a larger hook for this pattern?
Yes, using a larger hook will make the fabric drape more loosely and increase the size of the hat. If you use a 6.0 mm hook, the hat will be larger and less dense.
Is this project suitable for a total beginner?
Absolutely. Because it uses only the half double crochet stitch and requires no shaping, it is an ideal first project for those who have mastered the basic chain.
How do I attach a pom-pom to the top?
Once you have cinched the top closed as described in the Assembly section, leave a few inches of yarn. Thread this through the base of a store-bought or handmade pom-pom and tie it firmly to the top center of the hat.
Can I sell the finished hats I make from this pattern?
You are welcome to sell finished items made from this pattern in small quantities. Please credit the design to this website when listing your items online.
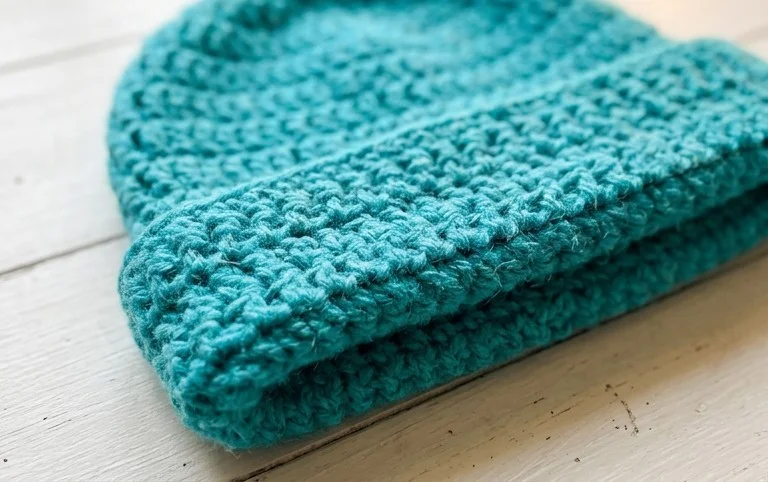
Your new winter accessory now provides a cozy layer of protection against the wind, especially once you fold the cuff for that classic, structured profile. Consider experimenting with a variegated yarn or adding a large faux fur pom-pom to the top for a personal touch that suits your wardrobe perfectly. Sharing a photo of your finished work online helps other makers find inspiration for their own yarn stashes. Please feel free to browse through the rest of the blog for more accessible, beginner-friendly projects to fill your project queue throughout the coming months.