Easy Maple Leaf Crochet Coaster: Free Autumn Pattern
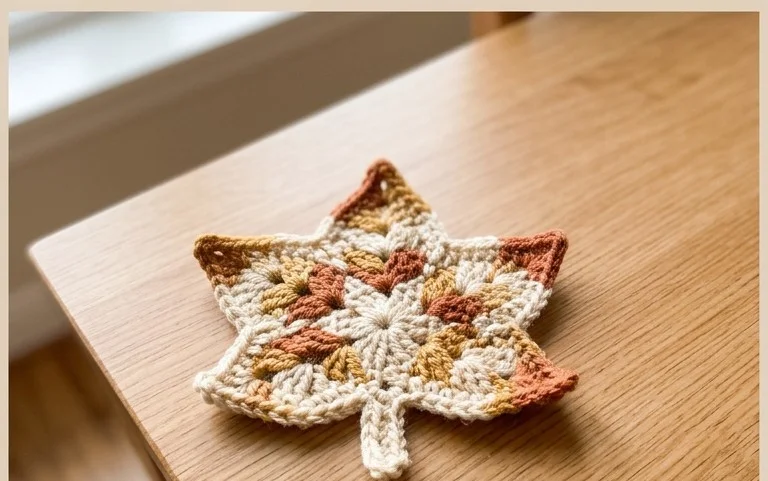
Crisp golden leaves scattered across your coffee table provide the inspiration for this textured seasonal project. This coaster design mimics the jagged edges of a maple leaf using basic increases and decreases, making it accessible even if you are new to shaping your work. You will hold a soft, thick accessory that protects your wood surfaces from condensation while adding a touch of fall warmth to your morning routine. We focus on mastering the picot edge and simple stitch counts to achieve a defined, sharp outline that lays flat without curling on your desk.
Why You’ll Love This Pattern
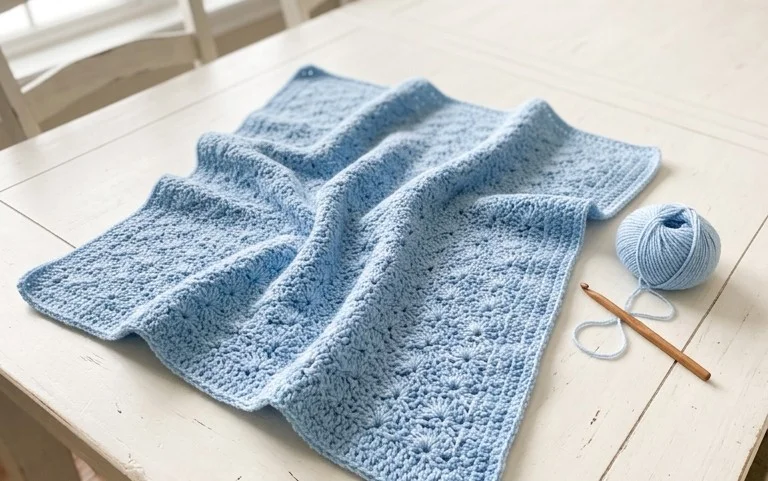
The Classic Crochet Granny Square is the quintessential building block for fiber artists because it balances simplicity with endless versatility. This pattern relies on a repeating sequence of double crochet clusters, which creates a rhythmic, meditative pace perfect for clearing your head after a long day. You can finish a single square in under twenty minutes, making it an excellent way to use up leftover yarn ends from larger projects. Its modular nature means you can start with one square and continue until you have enough to form anything from a small coaster to a sprawling throw blanket.
I finally learned how to make these squares after years of avoiding them. The instructions were so clear that I managed to make six in one evening while watching a movie.
— Sarah, beginner crocheter
Pattern Overview & Skill Level
- Skill Level: Beginner
- Approximate Time: 15–20 minutes per square
- Construction: Worked in joined rounds, starting from the center and expanding outward
- Finished Dimensions: Approximately 5 inches by 5 inches using worsted weight yarn
Materials & Supplies Needed
- Yarn: Worsted weight (#4 medium) acrylic or cotton blend, approximately 15 yards per square.
- Hook Size: 5.0 mm (US H-8) crochet hook.
- Notions: Yarn needle for weaving in ends, sharp scissors.
- Safe Yarn Substitutions: You can use DK weight yarn with a 4.0 mm hook for a smaller, tighter square, or bulky weight yarn with a 6.0 mm hook for a larger, quicker square. Note that changing yarn weight will significantly alter the final dimensions and drape.
Stitch Guide & Abbreviations (US Terms)
- ch = chain
- st/sts = stitch/stitches
- sl st = slip stitch
- dc = double crochet
- dc cluster = 3 double crochet stitches worked into the same space
- sp = space
- Magic Ring: An adjustable starting loop used to begin rounds.
Step-by-Step Pattern Instructions
This pattern is worked in rounds. Always join with a slip stitch to the top of the beginning chain at the end of every round.
Square Body
- Rnd 1: Start with a magic ring. Ch 3 (counts as first dc here and throughout), work 2 dc into the ring, ch 2, *3 dc into ring, ch 2; repeat from * twice more. Join with a sl st to the top of the starting ch-3. (12 dc, 4 ch-2 sps)
- Rnd 2: Sl st into the next ch-2 sp. Ch 3, 2 dc, ch 2, 3 dc in same corner sp. *Ch 1, (3 dc, ch 2, 3 dc) in next ch-2 corner sp; repeat from * twice more. Ch 1, join with sl st to top of starting ch-3. (24 dc, 4 corner ch-2 sps, 4 side ch-1 sps)
- Rnd 3: Sl st to the first corner sp. Ch 3, 2 dc, ch 2, 3 dc in corner. *Ch 1, 3 dc in next ch-1 sp, ch 1, (3 dc, ch 2, 3 dc) in next corner sp; repeat from * twice more. Ch 1, 3 dc in last ch-1 sp, ch 1, join with sl st to top of starting ch-3. (36 dc, 4 corner ch-2 sps, 8 side ch-1 sps)
- Rnd 4: Continue the pattern by working 3 dc into each ch-1 side space and (3 dc, ch 2, 3 dc) into every corner ch-2 space, separated by ch 1. Join with a sl st to finish.
Finishing
Fasten off your yarn, leaving a six-inch tail. Use your yarn needle to weave the tail through the back loops of the final round stitches to secure it. Repeat this for the center tail to ensure the magic ring does not unravel.
Care & Washing Instructions
- Hand wash your finished squares in cool water using a gentle liquid detergent.
- Lay the squares flat on a towel to air dry, reshaping them into a perfect square while damp.
- Do not wring or twist the fabric, as this can stretch the stitches and distort the shape.
Pro Tips & Common Mistakes to Avoid
- Maintain consistent tension by ensuring your yarn feed is smooth and your hook holds the yarn at the same point during every pull-through.
- Place a stitch marker in the top of your starting chain-3 to easily identify where to join at the end of each round.
- Weave your ends in multiple directions—horizontally, vertically, and diagonally—to prevent them from slipping out over time.
- To adjust the size, simply add more rounds following the pattern logic of placing clusters in side spaces and corners in corner spaces; adding rounds will require proportionately more yarn per square.
Frequently Asked Questions
Can I use different colors for each round?
Yes, this is a popular way to use up scrap yarn. Fasten off at the end of every round and join your new color in any corner space to start the next round.
How do I keep my edges straight?
Ensure you are not missing the ch-1 spaces along the sides. If you skip a ch-1 space, the edges will pull inward and cause the square to curl.
Is this pattern suitable for making a sweater?
Yes, you can join these squares together to create a variety of garments. Check your specific garment pattern for the required number of squares before you begin assembly.
Am I allowed to sell blankets made from this pattern?
Standard practice for independent designers is to allow the sale of physical items made from their patterns, but you should always credit the designer. Check the specific terms provided by the source if this pattern was purchased.
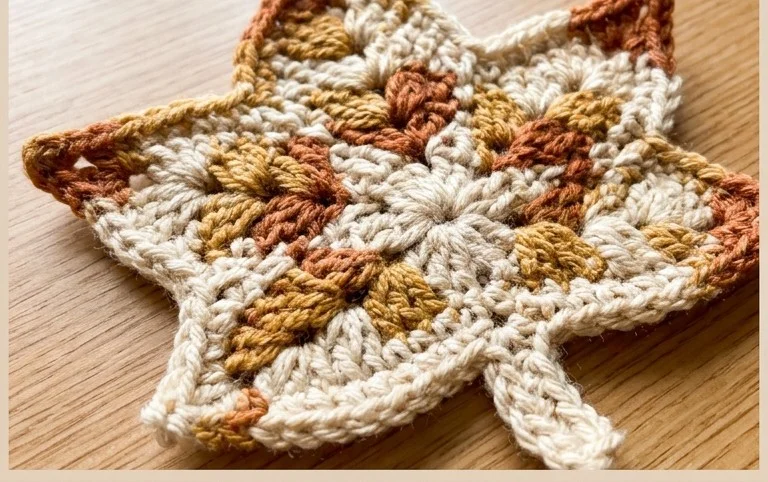
Your finished coaster brings a distinct seasonal charm to your home and serves as a functional piece of decor during the colder months. You can create a set in deep ochre, burnt orange, and dark espresso shades to mimic the natural progression of foliage outdoors. Consider using a thin jute twine for a rustic farmhouse look or a sturdy cotton for easier washing. Tag your photos with our community handle so we can see your finished work, and browse our blog for more seasonal projects that use up your leftover yarn stash.