Easy Pig Granny Square Blanket: Free Step-by-Step Pattern
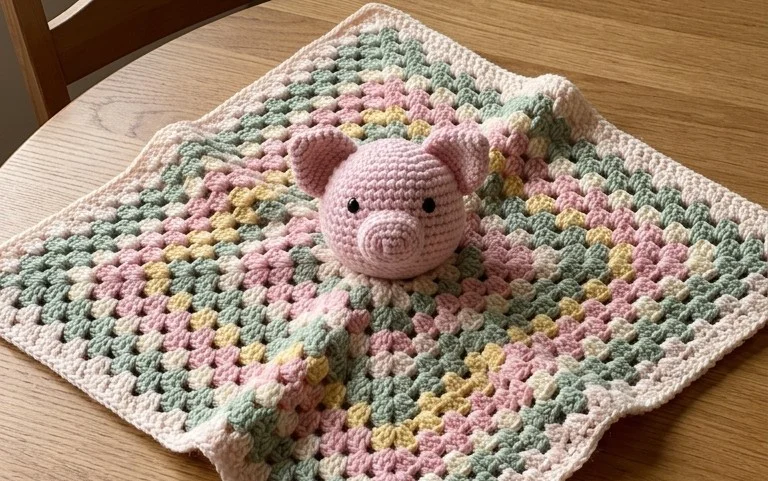
A soft, pink pig face centered within a classic square creates a charming focal point for any handmade throw. The finished fabric carries a sturdy, squishy texture that makes it hold up well against daily use on the living room sofa. This pattern provides a gentle entry point for beginners who want to move beyond simple rows and practice color changes in the round. You will master the process of working stitches into a small center ring and managing the tension of multiple yarn colors. It serves as a creative project for anyone building a collection of whimsical, decorative home accessories.
Why You’ll Love This Pattern
The Classic Crochet Granny Square is the quintessential project for building fundamental skills while creating a versatile building block for larger items. It works up quickly using basic stitches, making it a reliable choice for mindful, repetitive stitching during downtime. Because each square requires only a small amount of yarn, it is an ideal way to use up leftover ends from previous projects. You can easily adjust the size of the final piece by changing the number of rounds, giving you full control over your project dimensions.
I finally mastered the transition between rounds thanks to the clear joining instructions, and now I have a whole stack of these squares ready for a blanket.
— Sarah, hobbyist crafter
Pattern Overview & Skill Level
- Skill Level: Beginner
- Approximate Time: 30 minutes per square
- Construction: Worked in joined rounds, starting from a center ring and expanding outward.
- Finished Dimensions & Sizing: Approximately 5 inches by 5 inches using worsted weight yarn.
Materials & Supplies Needed
- Yarn: Worsted weight (#4), 100% acrylic or wool blend, approximately 15 yards per square.
- Hook Size: 5.0 mm (US H-8).
- Notions: Tapestry needle for weaving in ends, sharp scissors.
- Safe yarn substitutions: You may use DK weight yarn for a smaller, more delicate square, though you may need to add an extra round to match the 5-inch size goal. Using bulky weight yarn will result in a larger, thicker square and will require a larger hook, such as a 6.0 mm.
Stitch Guide & Abbreviations (US Terms)
- ch: chain
- st/sts: stitch/stitches
- sl st: slip stitch
- dc: double crochet
- dc cluster: a group of 3 dc stitches worked into the same space
- sp: space
- RS: right side
Step-by-Step Pattern Instructions
Granny Square Body
- Rnd 1: Start with a magic ring or ch 4 and sl st to the first chain to form a loop. Ch 3 (counts as first dc), work 2 dc into the ring, ch 2. *Work 3 dc into the ring, ch 2. Repeat from * 2 more times. Join with a sl st to the top of the beginning ch-3. (12 dc, 4 ch-2 spaces)
- Rnd 2: Sl st into the next 2 sts and into the first ch-2 corner space. Ch 3, work 2 dc, ch 2, and 3 dc all in the same corner space. *Ch 1, skip 3 sts, (3 dc, ch 2, 3 dc) in the next ch-2 corner space. Repeat from * 2 more times. Ch 1, join with a sl st to the top of the beginning ch-3. (24 dc, 4 ch-1 spaces, 4 ch-2 spaces)
- Rnd 3: Sl st into the next 2 sts and into the first ch-2 corner space. Ch 3, 2 dc, ch 2, 3 dc in the same corner space. *Ch 1, 3 dc in the next ch-1 space, ch 1, (3 dc, ch 2, 3 dc) in the next corner space. Repeat from * 2 more times. Ch 1, 3 dc in the last ch-1 space, ch 1, join with a sl st to the top of the beginning ch-3. (36 dc, 8 ch-1 spaces, 4 ch-2 spaces)
- Rnd 4: Continue in established pattern, working 3 dc in each side ch-1 space and (3 dc, ch 2, 3 dc) in each corner ch-2 space, with a ch-1 between each cluster on the sides. (48 dc, 12 ch-1 spaces, 4 ch-2 spaces)
Finishing
Fasten off yarn leaving a 6-inch tail. Pull the tail through the final loop to secure. Use a tapestry needle to weave the end through the back of the stitches, ensuring it is hidden within the dc clusters. Do not pull too tightly, or the edges will pucker.
Care & Washing Instructions
- Hand wash in cool water with a gentle wool-safe detergent to preserve the fibers.
- Lay the square flat on a clean towel to air dry, reshaping it gently while damp.
- Steam block lightly if the corners are curling, keeping the iron or steamer several inches away from the yarn.
Pro Tips & Common Mistakes to Avoid
- Maintain consistent tension: Keep your yarn tension relaxed, especially on the chain spaces, as tight chains will cause the square to cup inward instead of lying flat.
- Use a stitch marker: Place a stitch marker in the first ch-3 of each round to easily identify where to join your slip stitch at the end of the round.
- Weave ends as you go: Because this pattern involves changing colors or finishing rounds, weaving in ends immediately prevents a daunting task once the final square is complete.
- Adjusting size: You can make the square larger by simply repeating the logic of Rnd 4, adding one more cluster into every side space for each additional round. Note that increasing the size will consume more yarn, so ensure you have enough yardage for larger projects.
Frequently Asked Questions
Can I use a different hook size than recommended?
Yes, you can use a smaller hook for a tighter, stiffer fabric or a larger hook for a drape-heavy result. Always check your gauge if you are joining multiple squares together, as variations in hook size will change the final dimensions.
Is this pattern suitable for complete beginners?
This pattern is excellent for beginners because it relies on the double crochet stitch and basic chain spaces. Once you grasp the corner formation, the pattern repeat becomes very intuitive.
How do I prevent the square from twisting?
Twisting often occurs if the stitch count is incorrect or if tension changes mid-round. Ensure you are working into the ch-2 spaces accurately and always count your clusters to confirm you have 4 corners in every round.
Am I allowed to sell items made from this pattern?
You are welcome to sell finished items created from this pattern. We suggest including credit to the designer in your product listings to support the continued creation of free resources.
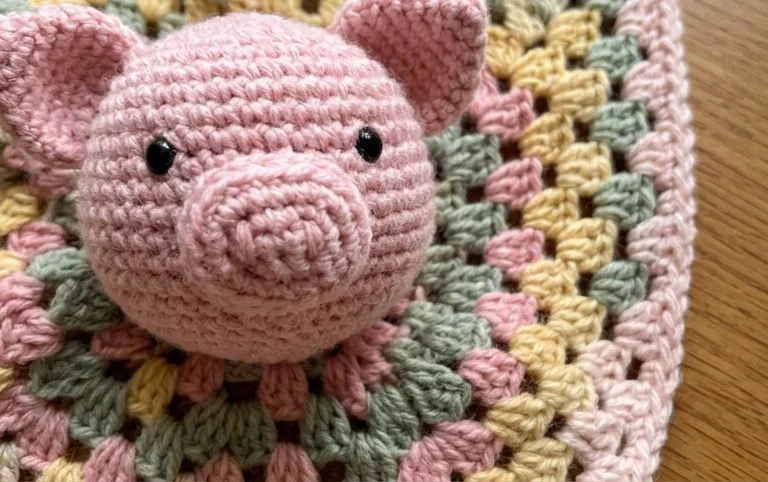
Your finished squares create a warm, playful blanket that brings character to any child’s room or reading nook. You might consider using a variegated yarn for the background to give your project a slightly textured, modern appearance that complements the solid pink pig faces. Please share a photo of your completed assembly on social media so others can see how your color choices turned out. Check out our blog for more free patterns that help you build your collection of handmade blankets and soft accessories.